
Changing a dirt bike tire can seem tricky at first. But with the right guide, it’s easier than you think.
In this step-by-step DIY guide, you will learn how to change a dirt bike tire, even if you are a beginner. Dirt bike tires take a beating on rough trails. They need to be replaced regularly to ensure safety and performance.
Knowing how to change them yourself can save you time and money. It also gives you a sense of accomplishment. This guide will break down the process into simple steps that anyone can follow. Whether you’re new to dirt biking or just new to tire changes, this guide is for you. Let’s dive in and get your dirt bike back on the trail!

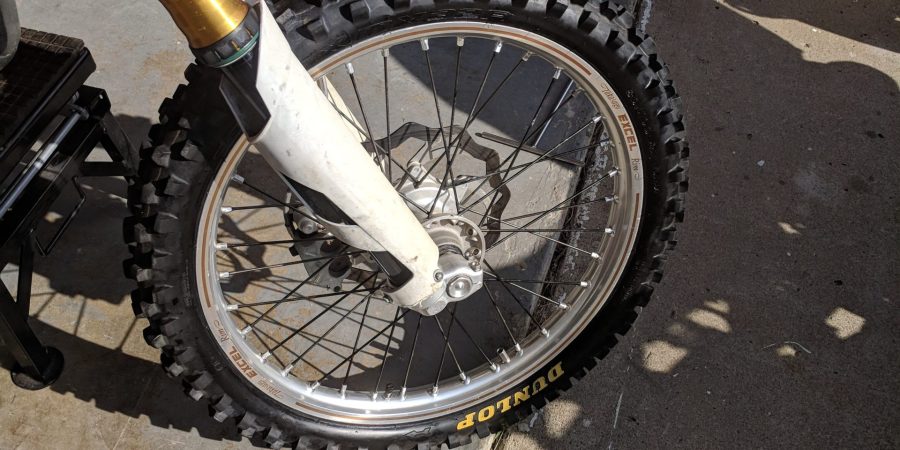
Credit: www.diymotofix.com
Tools And Materials Needed
Changing a dirt bike tire might seem daunting. With the right tools and materials, it becomes a manageable task. Here’s a detailed list of what you need to get started.
Essential Tools
- Tire Irons: You will need at least two. These help in prying the tire off the rim.
- Air Compressor: This is necessary to inflate the tire once it’s mounted.
- Bead Breaker: This tool helps in breaking the bead seal of the tire.
- Valve Core Remover: This tool is used to remove the valve core from the valve stem.
- Axle Wrench: You’ll need this to remove the wheel from the bike.
Additional Supplies
- New Tire: Make sure it fits your bike’s specifications.
- Inner Tube: If your bike uses a tube, have a new one ready.
- Rim Protectors: These help prevent damage to the rim during the tire change.
- Tire Lubricant: This makes it easier to mount the new tire.
- Work Gloves: Protect your hands during the process.
Having these tools and materials ready will make changing your dirt bike tire much easier. Gather everything before you begin, and you’ll be set for a smooth tire change.

Credit: www.youtube.com
Preparing Your Work Area
Changing a dirt bike tire can seem daunting for beginners. Proper preparation of your work area can make the process smooth and hassle-free. This section will guide you on how to set up the perfect workspace for changing your dirt bike tire.
Choosing A Location
Selecting the right location is crucial. You need a flat, stable surface to work on. A clean garage or driveway works well. Ensure the area is well-lit so you can see every detail. Avoid working on grass or uneven ground as it can make the bike unstable.
Gathering Equipment
Having all the necessary tools at hand is essential. Below is a table listing the basic tools you will need:
| Tool | Purpose |
|---|---|
| Tire Irons | For removing the tire |
| Bead Breaker | To break the tire bead |
| Lubricant | Helps the tire slide off |
| Air Compressor | To inflate the new tire |
| Valve Core Tool | Removes the valve core |
Make sure to gather all the equipment before you start. This will save time and reduce frustration. Below is a checklist to ensure you have everything:
- Protective gloves
- Safety glasses
- Bucket of soapy water
- Rags or towels
- Torque wrench
By preparing your work area properly, you set yourself up for a successful tire change. A good workspace makes the process faster and safer.
Removing The Wheel
Removing the wheel is the first step in changing a dirt bike tire. It might seem tough, but it’s easy with a few simple steps. This section will guide you through loosening the axle nut and detaching the brake caliper.
Loosening The Axle Nut
Start by placing the dirt bike on a stand. This gives you easy access to the wheel. Locate the axle nut, which is usually on one side of the wheel. Use a wrench to loosen the axle nut. Turn it counterclockwise. Don’t remove it completely yet. Just enough so it’s easy to remove later. This step is crucial because it makes the wheel removal easier.
Detaching The Brake Caliper
Next, you need to detach the brake caliper. This is important because it prevents damage to the brake system. Locate the bolts that hold the caliper in place. These are usually near the wheel. Use a suitable tool, like an Allen wrench, to unscrew these bolts. Once loose, carefully slide the caliper off the brake disc. Place it somewhere safe. Be careful not to strain the brake line. Now, the wheel is almost ready to be removed.
Breaking The Tire Bead
Breaking the tire bead is a crucial step in changing a dirt bike tire. The bead is the part of the tire that sits on the rim. Breaking it can be tricky, especially for beginners. There are two main ways to break the tire bead: using a bead breaker or doing it manually. Let’s explore both methods in detail.
Using A Bead Breaker
A bead breaker is a tool designed to separate the tire bead from the rim. Using a bead breaker can make the job much easier and faster. Here’s how you can do it:
- Place the tire on a flat surface.
- Position the bead breaker tool against the tire bead.
- Press down on the tool to apply pressure.
- Move the tool around the tire to break the bead completely.
Pro Tip: Use soapy water to lubricate the tire bead. This helps the bead breaker slide more easily.
Manual Bead Breaking
If you don’t have a bead breaker, you can still break the tire bead manually. It requires more effort but is entirely doable. Follow these steps:
- Lay the tire flat on the ground.
- Use a tire iron or a large flat-head screwdriver.
- Insert the tool between the tire and the rim.
- Press down to separate the bead from the rim.
- Work your way around the tire to free the bead completely.
Important: Be careful not to damage the rim or the tire. Apply steady, even pressure.
Removing The Old Tire
Changing a dirt bike tire can seem like a tough task. But it’s easier with the right steps. Removing the old tire is the first step. This guide will show you how to do it.
Levering Off The Tire
First, you need to loosen the tire from the rim. Use tire levers for this. Start by deflating the tire completely. This makes it easier to work with. Insert the tire lever between the tire and the rim. Push down on the lever to lift the tire off the rim. Move around the tire, repeating this action. Eventually, the tire will come off the rim.
Inspecting The Rim
After removing the tire, inspect the rim. Check for any damage or dirt. Clean the rim with a cloth. Look for cracks or dents. A damaged rim can cause problems. It’s best to replace it if it’s damaged.

Credit: us.rabaconda.com
Installing The New Tire
You’ve removed the old tire. Now it’s time to install the new one. This part may seem tricky, but with a few steps, you can do it easily. Follow these steps to ensure a smooth installation.
Lubricating The Bead
First, you need to lubricate the bead of the new tire. This helps the tire slide onto the rim easily. You can use soapy water or tire lubricant. Apply it generously around the tire bead. Make sure the entire bead is covered. This step is crucial for a smooth installation.
Seating The Tire
Next, start seating the tire onto the rim. Begin by placing one side of the tire onto the rim. Use your tire irons carefully to avoid pinching the tube. Work your way around the tire, pushing it onto the rim. Once one side is on, insert the tube if you have one. Ensure the tube is not twisted or pinched. Then, seat the other side of the tire. Use your tire irons to help guide the tire onto the rim. Take your time and be gentle. Proper seating ensures a balanced and safe ride.
Reattaching The Wheel
Once you’ve successfully changed your dirt bike tire, it’s time to reattach the wheel. This step is crucial for ensuring your bike is safe to ride. Follow these steps to align the axle and secure the brake caliper properly.
Aligning The Axle
First, position the wheel back into the frame. Make sure the axle aligns with the holes on both sides. Insert the axle through the wheel hub and into the frame. It’s essential to keep the wheel centered. This ensures smooth and safe riding.
Use a wrench to tighten the axle nut. Tighten it until it is snug but not overly tight. Over-tightening can damage the threads. Once the axle is in place, double-check the alignment. Spin the wheel to see if it rotates smoothly. If it wobbles, you may need to adjust the axle again.
Securing The Brake Caliper
Next, reattach the brake caliper. Position it over the brake disc. Ensure it aligns properly with the mounting holes. Insert the mounting bolts and tighten them with a wrench. Properly securing the brake caliper is vital for your safety.
Check the brake lever to ensure it engages the brake pads correctly. If it feels loose, tighten the bolts a bit more. Ensure there is no play in the brake caliper. A well-secured brake caliper ensures your brakes function correctly.
Once everything is secured, give the wheel a final spin. Ensure it turns freely and the brakes engage smoothly. This step confirms that the wheel is properly reattached and ready for your next ride.
Checking Your Work
After you have successfully installed your new dirt bike tire, it’s essential to ensure everything is properly in place. This final step is crucial for your safety and the bike’s performance. Let’s go over the important checks you need to perform.
Inspecting The Tire
First, take a close look at the tire. Ensure it is seated evenly on the rim. Check for any bulges or irregularities. Also, make sure the tire bead is properly aligned.
Next, inspect the tire pressure. Use a reliable gauge to confirm it matches the manufacturer’s recommendation. Incorrect pressure can affect handling and safety.
Finally, examine the spokes. Tighten any loose ones and ensure they are evenly tensioned. This helps prevent wobbling and maintains the wheel’s integrity.
Taking A Test Ride
Once you are satisfied with the inspection, take your bike for a short test ride. Start slow and pay attention to any unusual sounds or vibrations.
Ride on different terrains to ensure the tire performs well. Check the handling and stability of the bike. If everything feels smooth and responsive, you’ve done a great job.
After the test ride, do a final check. Look over the tire and spokes again. Make sure everything is still secure.
Frequently Asked Questions
How To Remove A Dirt Bike Tire?
To remove a dirt bike tire, first deflate it completely. Then, use tire irons to pry the tire off the rim. Work around the tire until it’s free from the rim.
What Tools Do I Need To Change A Dirt Bike Tire?
You will need tire irons, a bead breaker, rim protectors, and a tire pressure gauge. These tools help safely remove and install the tire.
How Do I Know When To Change My Dirt Bike Tire?
Change your dirt bike tire when the tread is worn down or you notice cracks. Regular inspection helps maintain safety and performance.
How To Properly Inflate A Dirt Bike Tire?
Use a tire pressure gauge to monitor the air pressure. Inflate the tire to the manufacturer’s recommended PSI for optimal performance.
Conclusion
Changing a dirt bike tire isn’t as hard as it seems. Follow these steps, and you’ll gain confidence quickly. Practice makes perfect. With the right tools, you can do it yourself. Save time and money by handling it at home.
Remember to check the tire pressure regularly. A well-maintained tire ensures a safe ride. Happy riding!

Leave a Reply